What's on your workbench today?

  • Thread starter Wound_Up
  • Start date
  • This site may earn a commission from merchant affiliate links like Ebay, Amazon, and others.

Wound_Up

You can call me JC
Silver Member
Jan 23, 2020
10,700
NW LA
The schematic was pretty cooked.
I think I can fill in the missing bits.View attachment 795045

Google Newcomb and the part number, TR-XXX down in the corner. You can also Google newcomb transcription schematic and it'll pull up a bunch of schematics for different models of transcription players, which is what that is if the part number is TR-XXXX

Edit: nevermind. I think that's part of the schematic lol. Duh 🤦
 
Last edited:

Uluwatu

Strat-Talker
Dec 31, 2024
481
California
Google Newcomb and the part number, TR-XXX down in the corner. You can also Google newcomb transcription schematic and it'll pull up a bunch of schematics for different models of transcription players, which is what that is if the part number is TR-XXXX

Edit: nevermind. I think that's part of the schematic lol. Duh 🤦
You’re gonna freak, but for a few hundred dollars The local antique store has a matching maroon 1950s Newcomb transcription player, and he has the 16 inch disks for it as well.

The thing is it has a huge speaker and I wanted it just for that, but I haven’t convinced myself to spend the money yet.

Also, I don’t have a clue how much he wants for the disks. Finally I think it would be kind of a sin for me to buy it and rip it apart just for the amplifier.
 

Uluwatu

Strat-Talker
Dec 31, 2024
481
California
Well I freaked out about three times when I plugged this in and it didn’t come on.

My power cord was just switched off, and I switched it on and tried again. And failed again, not realizing I have never replaced the fuse after I was done soldering.

I had switched it on, but I had only switched on the motor circuit (and the motor is disconnected.) When I switched on the amplifier it lit right up.

First test was too quiet. There’s a 67k resistor on the input that can go away.
75726D0C-51C7-4C9E-BC31-2E7D9FE322BC.jpeg
It’ll probably still want a boost.

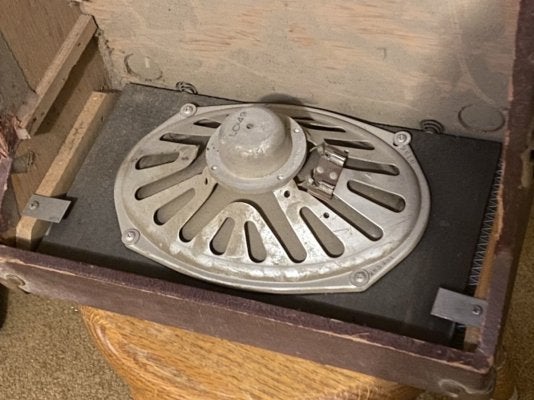
I have never seen anything like this before. The speaker is mounted on a free-floating baffle board that slides up and down and rests on 2 springs.
760B3F74-809B-4DA7-9315-FD21BDC7C1C3.jpeg

The speaker actually sounded OK playing the phonograph.
 

Uluwatu

Strat-Talker
Dec 31, 2024
481
California
I removed that resistor but it just wasn’t enough. This is definitely going to want the booster amp.

<Edit…..>
OK this was a pretty good setup with the 2B booster using the limiter. Amp on 10/10
17A53A13-DE1B-4985-B97B-B21C6F354BA4.jpeg
 
Last edited:

Uluwatu

Strat-Talker
Dec 31, 2024
481
California
Another detour…but a silent one.
X-36V is my old experimental 36VDC boat.
C9A76AB3-5E35-4D6C-BC18-5BC23700362F.jpeg It goes 6-8 hours on a charge but only does about 6 mph tops. If the batteries die I can junk-sail this boat using the Bimini top.

Here we are at the trickling headwaters of Deer Creek (one of the tiny tributaries feeding into the Kings River at Pine Flat Lake.) This is a gushing waterfall in the spring.
B77358B7-9A3C-499F-87FE-8656DA8979D3.jpegThe lake is very full right now and we had a lovely time.

I charged the batteries before we went out, but when we came home my hand built 36 V charger died.

52461EEB-C88F-4430-A2FF-6DC98B8CCCF4.jpeg
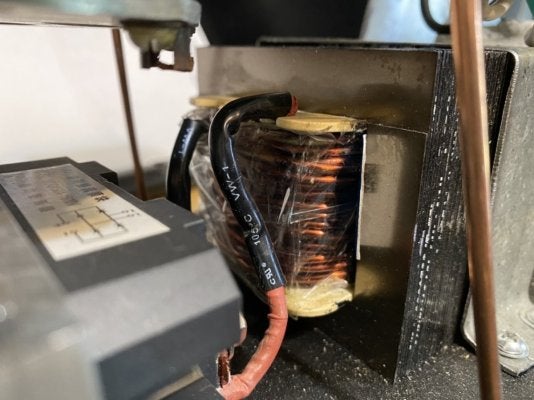
It appears that the primary winding is intact and the diodes are ok as well as the switch fuse and wires. I either have a loose wire inside or the secondary winding is open.

I would take that hard, because I rewound that transformer by hand for this charger.
 

Uluwatu

Strat-Talker
Dec 31, 2024
481
California
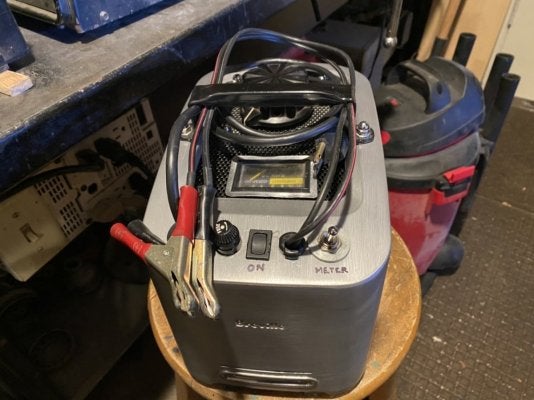
I built this battery charger in the cast aluminum case of an expensive toaster, on a thick MDF base. Chrome acorn nuts to make it shine a bit.
BFCA525E-54E5-4D5B-B89E-5662F713A3E3.jpeg

Ammeter came from a dead Schumacher charger. Scrap screen from a security door. Handle from scrap steel door tubing.

77293B9F-F5FC-4659-93DE-ABFA84F0965A.jpeg
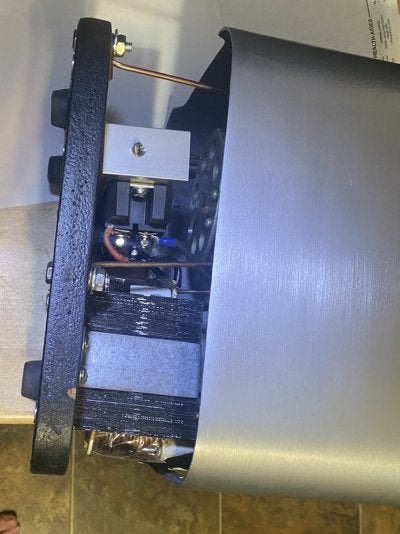
It only comes open this far before the wiring has to come loose. I unscrewed the diode bridge too, for more access.
61688DFE-90C8-44F7-822D-136A08AB2FD5.jpeg
The cast aluminum military surplus 1950’s variac is built like a tank, and it still works like new. It stands on legs I bent of 1/8” welding wire.
1EF94553-1C45-4E78-A7A4-7242DD5B41A6.jpeg
A homemade strap holds the transformer. This transformer is a heavy beast, from a burned out 24v Cyberpower UPS. The diode bridge is equally beefy.

By splitting the laminated core, bit by bit, I had removed the plastic spool.

By removing unneeded windings, I could rewind the spool to make 42 volts . . . but now it really makes up to 44 from 120vac.
9E5A4580-1337-475F-8A67-2E8B5F2D7389.jpeg
It seems that transformer turn ratio calculations are only approximate in real life.

Also, it seems my ammeter may be intermittent. Phooie! I don’t have another.

I got a signal thru it, but the meter seems loose in the case. Like maybe it overheated, melting the plastic a bit.

So after bypassing the flaky meter, I’m crankin’ out the full 0~44 vdc.
B947FFAE-9700-432B-B102-45BE72944F4E.jpeg
 

Uluwatu

Strat-Talker
Dec 31, 2024
481
California
Well the battery charger is back in action, and I added a switch to shunt the ammeter so I wouldn’t blow it out on high charge situations.
82AAA311-FB79-4456-95BD-F90C3F1D655F.jpeg
 

Uluwatu

Strat-Talker
Dec 31, 2024
481
California
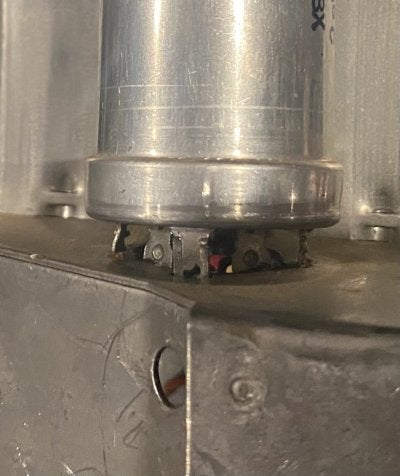
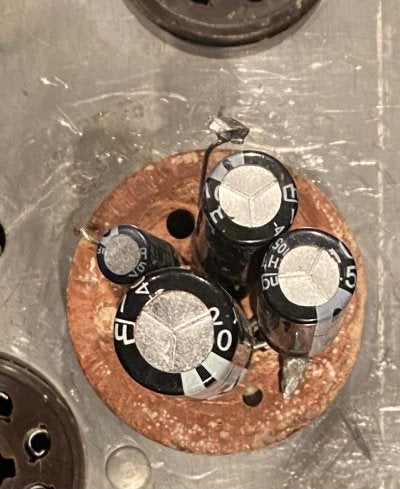
So I’m back working on the little Newcomb phonograph amplifier. The multi-capacitor can on this amplifier had been gutted, refilled, and taped back together in a rather rustic manner.
DEDEE1AD-2CC4-4584-A0FC-A61F83E8334F.jpeg
I’m afraid the soldering and additional redundant ground wires were done in an equally rustic matter.

After opening it up to see how it was done I realized I had another can just like this one (if having different markings.)

I took this off of the 1961 Zenith radio chassis very carefully so as not to damage the zinc can.
665624D2-3ED4-466C-BEF9-61369456D644.jpeg
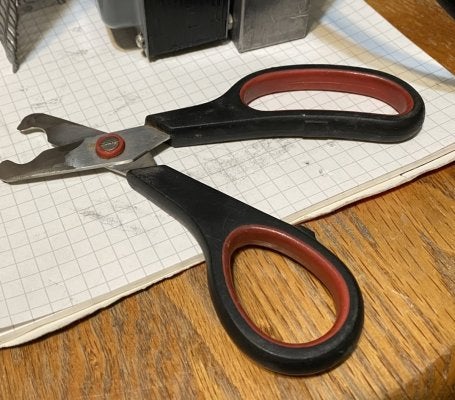
I shaved the bottom off the Zenith can. Nippers removed the lugs, then a belt sander opens the can.
9C48ECBF-8FE1-4004-B5D8-7D127A63C421.jpeg
After extraction of the burnt rolled foils.
4FE69AD5-80CF-4B8A-803D-19F35934FBA3.jpeg

Oh my! This “ground” nearly got soldered to the chassis!
D712B9E3-45FC-414B-B757-719F54144AB0.jpeg
The pile of corroded bits came from the base inside of that butchered can.
5B83ECC8-F817-4DAA-8E64-67846A5E6B02.jpeg
All the white stuff is zinc gone bad & with a lot of judicious scraping I managed to clean the insulator, and I decontaminated it thoroughly.

By removing every bit of the old zinc can, leaving only the galvanized steel support soldered directly to the chassis, I saved the fiberboard insulators.

Here I drilled them for an internal ground.
A0EF7C3A-C934-4506-949A-B0A062FD17F6.jpeg

I made a little horseshoe out of number 12 copper wire and I soldered it directly to the underside of the chassis. It extends up through a little hole I drilled into the fiber board, loops over, and goes back down to rest in another hole drilled halfway through.
571594DA-5B05-4FF6-ADB6-28094793D391.jpeg
This wire was all pre-tinned with solder before I put it in place, and after it was soldered to the chassis it was easy to connect the four ground leads of the little capacitors.


This will provide a little frame as well as a ground, and I can glue the 4 capacitors to it to prevent jiggling.

Of course I did a test before I sealed it all up and it sounds the same as it did before. Maybe a little better because I’m prejudiced now that I have worked on it.

Here it is with the new can.
BBD4E242-2355-4F97-8F06-43F8C6AD7D17.jpeg


I put the little red jewel in the chassis for the pilot light just in time to have the pilot light bulb fail.
E04712B8-F8F4-4393-8C9A-D7FFBCF06FCE.jpeg
 

Uluwatu

Strat-Talker
Dec 31, 2024
481
California
I bench-tested this amplifier today with the speakers from the Zenith radio and it sounded terrific.
864DEF50-445F-46C3-8572-AC223D9664F9.jpeg
After testing, I stripped off the grill plate and the speakers and all of the mounting studs.

51199681-4954-485E-B00E-8AB0797ABDD6.jpeg

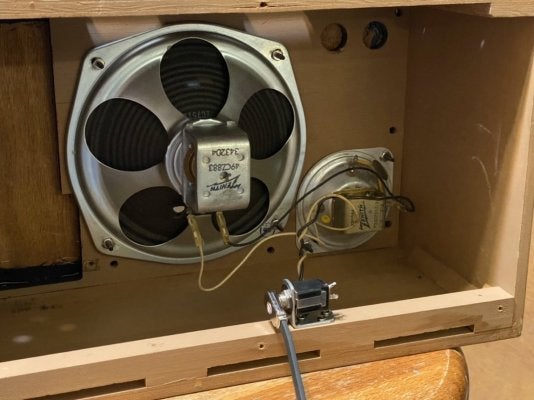
This has a 7 inch speaker and a 3 inch tweeter. Unfortunately the amplifier does not fit in the cabinet this way.

3E00A6BC-2CE0-4357-A360-A6E648B8119A.jpeg

The outside dimension of the amplifier is, most unfortunately, the same as the outside dimension of the speaker cabinet.

If you turn the cabinet horizontally there is a problem with the speaker placement. Even with the new baffle board it’s not going to be workable.

What I think is going to happen is the speaker will get a new baffle board, and this amplifier gets its own little cabinet.

These are some strange little studs for mounting the speakers. They have coarse left handed threads that bite into the baffle. Otherwise they take ordinary number eight nuts.
52ECC04F-2F86-4739-BD46-224DC0D8DF5C.jpeg
 

Uluwatu

Strat-Talker
Dec 31, 2024
481
California
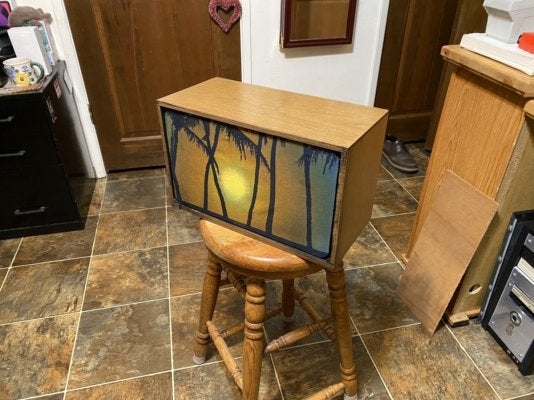
I made a new plywood baffle and covered it with cloth, then I put the speaker cabinet back together and wired in a jack.
37D76263-7938-46C4-A1D6-626395E4C124.jpeg

I spent some time rubbing out the cabinet wood with furniture oil. The cloth looks bad and I’m going to end up redoing it. It needs new rubber feet.

1FFD4AC8-A3EB-4C7C-82A0-6C9661CED72C.jpeg
The jack came from a cheap Chinese guitar, but it still works and it’s not rusty.

2BE0B4AA-8BAB-402B-A2D4-4E45A6FC3E77.jpeg
 

Uluwatu

Strat-Talker
Dec 31, 2024
481
California
This will need some rubber feet as well.

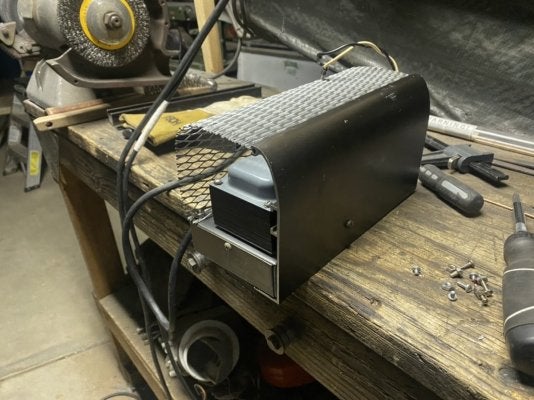
I’ve been working on a cabinet for the little amplifier, and I think I’m just going to make two flat ends out of hardwood and screw them on.

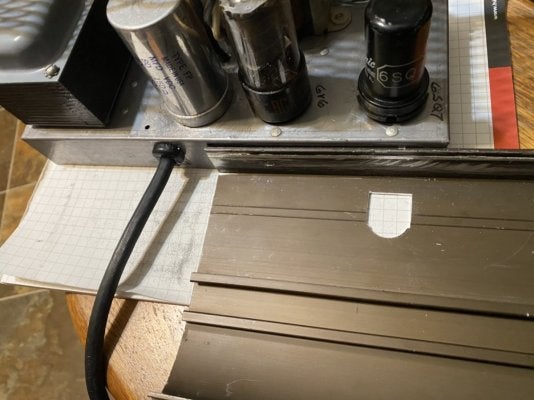
The back is a piece of bronze anodized windowsill made from 6063 T5 aluminum. It’s been knocking around in my scrap bin for 40 years.
8B429870-8B7F-4DA5-B831-C2BDD65BE3A7.jpeg

The front is made from the speaker grill of the old Newcomb phonograph.

4FFA5DB8-CB0F-4660-96C2-969A9353D855.jpeg


It also needs a new 6v pilot bulb & a quarter inch speaker-out jack.

I’d love to relocate the power cord to the back of the chassis. Room inside the chassis will probably allow this. It will sincerely complicate the assembly unless I cut a big slot in the aluminum extrusion.
 

Uluwatu

Strat-Talker
Dec 31, 2024
481
California
The cabinet wood is in pretty good condition for 64 years old but the bottom plywood face was exceptionally dry and starting to split. I scraped off the old stickers and gave it a good coat of shellac, and some new rubber feet.
60BA9760-CF29-401D-8702-57EDF1A2FC97.jpeg

The amplifier was supposed to go here but it was never going to fit well even if I modified the cabinet.

456E83F0-6278-4371-AECB-ED88C9312866.jpeg

Anyhow I bought some wood to finish the amplifier cabinet, and some rubber feet, and it will just sit on top.
 

Uluwatu

Strat-Talker
Dec 31, 2024
481
California
Well I had to move the line cord to the back. I don’t have a D-D chassis punch, so I had to drill a 1/2” hole and file out the shape required to retain a legit modern strain relief.

DC631A9D-0769-4991-A991-5FE2D91461BC.jpeg

I made this little tool to help squeeze the plastic in place.
1CC9ADDB-5071-44AA-BE38-13B7AC0F8D8F.jpeg
Now I must re-solder the line cord, and find a 3/4” hole plug, or a cover for the front.
 

Uluwatu

Strat-Talker
Dec 31, 2024
481
California
I had to relieve the back panel for easy cord access.
71A5646F-44D1-46A6-81CA-1A0A60353EE8.jpeg

This old plug has been in my tool box about 50 years.

473E042D-E75F-4951-8E1C-1180EBF60611.jpeg

That cheap “silver” solder always looks like crap.
 

Uluwatu

Strat-Talker
Dec 31, 2024
481
California
Here I have shaped the wood ends and sanded them all smooth.

2B95AA85-4ACE-49E4-B8F7-4AE319DA6BE9.jpeg

I am match drilling them here and attaching with screws to the cabinet.

909D48C7-1EF2-47D1-B4B7-94654711DEB8.jpeg

You can see that the power cord and the speaker lead both come out the back now.

That big rubber grommet can go away, but I still need to put something on the front to dress up the unnecessary holes.

Also I had to relocate the fuse block slightly to clear some assembly screws.

I have to take this all apart again to put some stain and varnish on the wood, At that point I may put an external panel mount fuse holder on. I have several, but they are the cheap Chinese variety and I really am loathe to put them on this unit.

Unfortunately, when I was moving the oem fuse holder, I damaged a capacitor that was installed very tight. It was the anti-hum filter attached to the motor on-switch, and since I don’t have the phonograph motor installed anymore it didn’t worry me.

However, When I did the first test run tonight, it hums a bit without that capacitor.

I found a 480v rated poly cap in my stash that will probably do.

Anyhow, I’ve been having so much fun building this little thing that I have a brand new delay pedal I bought yesterday, and I still haven’t plugged it in and tried it yet.
 
Back
Top